No-Bake Coconut Cookie Bars

Chocolate is kinda my thing if you haven’t noticed from the presence of chocolate in my recipes. So when I am thinking of a new recipe, that’s usually where I start! Then I think to myself what goes best with chocolate? Well today I had a huge bag of coconut in my cupboard that was just ASKING to be made into a sweet treat!

Now in order for my sweet treats to be accepted into the realm of Sonya’s Open Cupboard they have to be tested and approved by both my nieces, nephews and my husband. All who are equally picky…When I presented these No-Bake Coconut Bars it was a success!

The kids loved them and so did Daniel and my sister, and me, and…well we ate them all so that was as many people I had try them that day!

My favorite part about these bars is that they are a no-bake recipe, that is super easy to make, especially if you are home with little ones! I take care of my nieces and nephews a lot who are all under the age of 10. Keeping things creative with them is super important to me so whenever there is a simple recipe to make with them it’s so much more fun!

The Coconut Cookie layer is great because you get to use your (washed) hands to mix and place in the pan which is great for stimulation!

For the Chocolate layer, you get to teach them about using a double boiler, and how easy it is for the chocolate to burn. This helps them learn precision and the importance of following directions! It also teaches me to be more patient and relaxed with them…so all around it’s a win-win!

LL 107-1.jpg

Coconut Cookie Layer

LL 107-5.jpg
  • 1 cup coconut flour

  • 2/3rd cup shredded coconut

  • 1/4th cup Agave

  • 1/4th cup hemp hearts

  • 1 tsp sea salt

  • 1/3rd cup full fat coconut milk

  • ½ cup sunflower butter

Chocolate Layer

  • 1 cup chocolate chips

  • 2 Tbsp coconut oil

Toppings (optional)

  • Toasted Coconut (see directions below)

Directions

Line an 8x8 Brownie pan with Parchment paper, making sure the paper covers the sides of the pan.

In a bowl whisk together the coconut flour, shredded coconut, hemp hearts & sea salt.

Add in the Coconut Milk, Agave, and Sunflower butter and mix until well combined, using your hands if need be!

Press the dough into the pan evenly, making sure to get the cookie base evenly into every corner!

Freeze the base for about 30 minutes.

While your base is in the freezer, combine your chocolate chips and coconut oil together and melt using a double boiler method. What I do is boil water and put it in a glass bowl, and then place the smaller glass bowl with the chocolate and coconut oil, into the hot water. Making sure the water doesn’t overflow into the small bowl. Make sure you are stirring the chocolate and coconut oil together. Feel free to replace the water with hot water halfway through if need be.

it should take about 5 to 10 minutes to melt the chocolate.

I have found that it is a super gentle way to melt the chocolate, and you end up with more control, especially since the amount of chocolate is small.

Once your chocolate is melted evenly pour evenly on top of the Coconut Cookie base and then place back into the freezer. If you want you can top with toasted coconut**!

After the cookie has been in the freezer for 30 minutes check to see if the chocolate has set. Once the chocolate has set take out, cut into squares and enjoy!

Toasted Coconut**

For the toasted coconut, all you have to do is preheat your oven to 350F

Put your desired amount of coconut on a baking sheet and bake it for about 8-10 minutes, making sure to keep an eye on it to make sure it doesn’t burn.

Let cool and use to top your No-Bake Coconut Cookie Bars!

Dairy Free Frozen Yogurt Bars

I don’t know about you, but today was one of those days where I just didn’t want to drive to the grocery store. YOu might ask “Sonya, isn’t that your job?” Well yes, it is my job to think up recipes, but the products, and then we’ll give you a new product, but who says you can’t get a little creative with what you have at home!
So today I bring you THE BEST frozen yogurt bars because the best things always happen when you are forced into being creative! lazy =’s success!…at least, some of the time.

LL 107-11.jpg

I made these thinking it would be a tested recipe, but once they came out of the freezer and saw that they were both beautiful and delicious, I knew there was no use tweaking the recipe.

I used WHole foods Dairy-free almond milk yogurt because it is one of the cheaper options out there, without having a million ingredients or hoards of sugar added! I will add the sugar on my own, thank you very much!

I also used a 60% dark chocolate bar which didn’t melt as well as the enjoy life chocolate chips, but I think worked better for the recipe anyway! Having the ribbons of thick chocolate and almond butter with the combination of the sweet/tart blackberries and the crunchy texture of the sunflower seeds were everyyythinggg. Not to mention the flavor combination of dark chocolate, almond butter and blackberries is an opportunity we are missing out on!

SO without further delay, let this ice-cream loving, frozen yogurt convert teach you how to make frozen yogurt!

LL 107-10.jpg

Makes: 9 Servings

Total TIme: 3 &1/2 - 5 & 1/2 hours

Assemble time: 30 minutes

Freeze time: 3 & 1/2 hours

Ingredients: 8

Ingredients

                Base

·         2 cups Dairy free plain yogurt

·         1/4th cup syrup or agave

·         1 tsp vanilla extract


Toppings

·         Blackberries

·         1/4th cup Dairy free chocolate

·         2 tbsp. coconut cream

·         1/4th cup almond butter

·         2 tbsp. sunflower seeds

Directions

Line an 8x8 baking pan with parchment paper so all the sides are covered as to prevent leaks, and set aside.

Combine the yogurt, syrup, and vanilla together and then pour into the lined pan. Drizzle in the almond butter and Berries and put in the freezer. This will allow your toppings to set a bit before adding more so they don’t all mix together.

Using the double boiler method, melt together the dark chocolate and coconut cream together until smooth. Take the pan out of the freezer and drizzle the chocolate sauce on top. Sprinkle with sunflower seeds and then freeze for at least 3 hours.

Take out of the freezer and enjoy immediately!

Don’t forget to pin it!

Paleo Zucchini Bread // GLuten-Free & Dairy-Free

I don’t know about you, but when It comes to Zucchini Bread I take things VERY seriously. Zucchini bread is one of those foods that is a win-win for both adult and child. Offering a sweet bread that kids and adults love while sneaking in some much appreciated green vegetables! Now even though it’s a winner, some of the more traditional recipes usually call for a good amount of gluten, dairy, sugar, etc. that usually put the zucchinis hard work down.

I was trying to figure out a way to make zucchini bread healthier without taking away all the good things it had to go for it. Things like a perfectly moist (don’t you just love that word?) and its sweet caramel taste!

Well, I have done it, folks, this Zucchini bread is Refines sugar-free, dairy free, gluten free, and can be made without oil if you substitute it for Applesauce! So here’s the recipe you and your taste buds have been missing out on!

Ingredients

• 1 &1/4th cup Almond Flour

• 1/3rd cup Coconut Flour

• 1 & 1/2 Cup Shredded Zucchini

• 6 Soaked Dates

• 3 large Eggs

• 1/4th Apple Sauce of Coconut oil

• 1 tsp Vanilla

• 1 & ½ tsp Baking Powder

• 1 & ½ tsp Cinnamon

• 1 tsp Maca root powder (optional, but gives the recipe more caramel flavors)

• Pinch of salt

Instructions

Soak the dates in hot water for about 10-15 minutes and then drain

Put the Zucchini, Melted Coconut oil, Dates, Eggs, and Vanilla in a blender or food processor and blend until liquid.

Mix together the dry ingredients and then combine with the Liquid Mixture. Put in a bread tin and sprinkle cinnamon and coconut sugar or cacao nibs on top!

Bake in the oven at 350 F for to 45-55 Minutes.

Let cool for about an hour and then enjoy!

Thanks for stopping by!

- Sonya Expert Zucchini Bread Baker.

pin it!

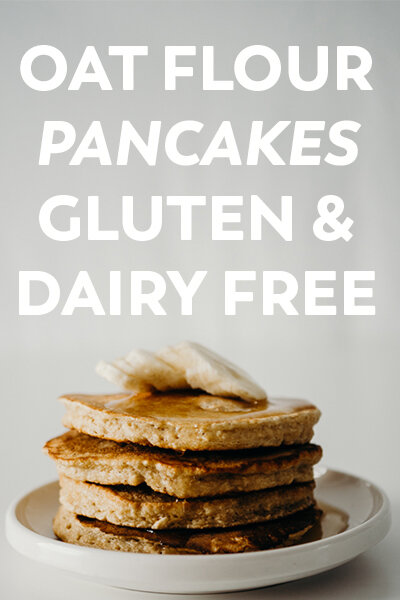
FLUFFY OAT PANCAKES // GLUTEN FREE & DAIRY FREE

I don’t know about you but when it comes to pancakes, Daniel and I mean business. We even have a weeknight dubbed pancake Saturday, where I come home from work, we make pancakes and watch a movie. Our favorites being Harry Potter and Lord of the Rings!

Every week it seems that I try a new recipe for myself since Daniel makes his perfect gluten and dairy-filled pancakes. He guards the secret family recipe with his life so don’t ask…sigh*

Anyway, each week I make my pancakes and have always faltered between near perfection, and pancake scramble that might sometimes taste like baking soda…I decided it was time to change so I gathered myself together and went to work!

My criteria for the pancaked were that they would be accessible for everyone, gluten & dairy-free, and if you don’t have allergies can be made with normal ingredients. I wanted the pancakes to be on the hardier side as well to keep you full and satisfied while maintaining that fluffy texture!

LL 107-1.jpg

For the flour, I chose oat because it’s cheap, easy, and easy to make! All you have to do is blend up your gluten-free or non-gluten free oats in any blender until a fine powder forms. If there are some larger pieces left that’s okay too! Just get it to the finest flour for the best results!

For the Dairy-free yogurt, I use an almond-based one. It is thicker than a lot of coconut yogurt, but feel free to either replace the dairy-free yogurt with regular yogurt, or even apple sauce. They will have a different flavor with the apple sauce of course and won't be as fluffy, but still very good!

Now all you have to do is combine all the ingredients and cook on a skillet at medium heat. This batch makes about 6 medium-sized pancakes. (I used a 1/4th cup measure).

LL 107-1-7.jpg

Now without further delay, here is the Perfect Pancake recipe!

Time 30 MInutes

Serving Size: 2

Makes 6 Pancakes

Ingredients

  • 1 cup oat flour

  • 2 Tbsp. coconut sugar

  • 1 tsp baking powder

  • 2 eggs

  • 1/4th cup dairy-free yogurt

  • 1/4th cup plant-based milk

  • 1 tsp vanilla

  • coconut oil for the pan

Directions

Whisk together the dry ingredients and then add in all of the wet ingredients. whisk until fully combines.

Grease a skillet and turn stovetop on medium heat. Let warm before pouring pancake batter onto skillet. Once bubbles begin to form and the edges of the pancakes are cooked about halfway through flip them.

Continue until all of your pancakes are cooked.

Serve warm with maple syrup, banana, chocolate chips, and almond butter for a breakfast/brunch/dinner you won’t forget!

Enjoy!

don’t forget to pin it

PANCAKES PIN.jpg

cinnamon oat muffins // Oil free & Gluten-free

The one thing I do have to say about muffins is that they are very underrated.

These gluten-free, dairy-free, and oil-free muffins are simple and delicious! With only 8 ingredients they are simple to whip up and enjoy immediately, or store for meal prep!

Using oat flour is great, but don’t feel the need to go hunting for a GF oat flour brand. All you have to do is blend regular oats until a fine powder forms and voila, you’ve got oat flour! When you use oat flour it's good to let your mixture sit for a few minutes to absorb some of the liquid. For this recipe make sure you set aside the mixture for about 10 minutes.

Another nice thing about this recipe is that it’s customizable! I left the flavors simple so that you have the freedom to add in chocolate chips, blueberries, cranberries, etc. If you want to leave them plain, the cinnamon, maple syrup, and applesauce give it a great light flavor that is sure to please everyone!

Check out the recipe and let me know what you think in the comments below!

P1140967.jpg

Serving size 1 muffin

time 40-45 minutes

Makes 9 muffins

  • 2 eggs

  • 1/2 cup unsweetened apple sauce

  • 1/3rd cup Dairy Free unsweetened yogurt (I used Kite Hill)

  • 1/2 cup Maple Syrup

  • 1 tsp vanilla extract

  • 2 cups oat flour (Make your own by blending whole oats until a flour forms)

  • 1 tsp cinnamon

  • 1 tsp baking powder

Directions

Pre-heat your oven to 350F and grease a muffin tin.

If you are making out flour at home, blend up just over 2 cups of oats until a fine powder is reached and set aside.

Mix all of the wet ingredients together and then slowly add in the dry ingredients.

Let the mixture sit for about 10 minutes.

once thickened add the mixture into your muffin tin about 3/4ths of the way full.

Bake for 25-30 minutes, let cool and enjoy!

pin it!

CINNAMON MUFFIN PIN.jpg

5 Minute Nutella Pudding // Paleo, Vegan, & Refined Sugar free

I don’t know about you, but when it comes to pudding I am a big fan. When I was little I specifically asked that if the circumstances arose that I was to live with my grandparents, I requested I be fed only chocolate pudding, Jell-O, and chocolate milk. I was 5 and there was no reason I would have gone to live with my grandparents. I just wanted to make sure I had everything in line just in case.

As you can probably guess I was a little dramatic and hopeful when it came to unlikely situations. Who would have known as an adult I wouldn’t be able to drink milk and have o desire to eat Jell-O. Thankfully my determination to enjoy the things I love has brought me here, making recipes out of thin air…or so people tend to think when I mention the fact that I can’t eat gluten or dairy. I came up with this recipe after dreaming of my favorite foods while staring into a near-empty fridge.

Once I realized there was a jar of coconut cream that demanded my attention I started to think about the possibilities and came to the conclusion that I really needed chocolate pudding in my life that wasn’t made from an avocado.

SO I used the coconut cream straight from the fridge, and it is important to do this as the coconut cream will be thicker and you can serve this treat immediately because the coconut cream will keep it cold!

The banana I used in place of sugar, so make sure it is ripe, but not so ripe that it tastes like, well an old banana.

I also used dry roasted hazelnuts to get the Nutella to feel, but you can use hazelnut butter if your that boujee.

LL 107-9.jpg

If you do not have the benefit of a high powered blender, feel free to use a food processor, and If you don’t have one of those, omit the hazelnuts for any type of nut butter you have on hand. This will change the flavor of course, but it will be just as tasty! It will feel more like peanut butter, banana vibe, but who doesn’t love that?

SO okay, done with all the chit chat, here’s the recipe!

Ingredients

  • 1 & 1/4th cup Cold Coconut Cream

  • 1 ripe Banana

  • 1/4th cup Dry Roasted Hazelnuts, or any nut butter you might have on hand

  • 2Tbsp cocoa powder

  • pinch of salt

Directions

In a high powered blender or food processor combine all of the ingredients and blend for 1-2 minutes, stopping to scrape down the sides of your machine.

Chill in the fridge for 1-2 hours.

Serve, top with hazelnuts, coconut chips and enjoy!