RHUBARB PEACH CRISP // GLUTEN FREE & DAIRY FREE

Daniel and I celebrated 5 years as a married couple this last weekend. I could tell you we had all these grand plans of road tripping, hanging out at a cool restaurant, going to a museum, etc. and we did have these plans! Then, we started to think about a few things…First off we live a Dave Ramsey lifestyle and are always looking for ways to save money to better our future. 

LL 107-1.jpg

He never tells you not to enjoy what we have been given, but also to know what you can afford and if possible, live below your means! Daniel and I have found great value in coffee shops, walks, working from home, watching movies, and just plain old talking. 

So we started with going to coffee, which turned into talking, talking about working together, creating recipes, making commercials, etc. We began to discuss our budget and realized what we wanted is to create more together, even if that technically meant working. 

So we came home, devised a plan, and got to work. We laughed and joked with each other, enjoyed good food, got to think creatively, and truly enjoyed our time together. I know this might be one of those scrolls to get the recipe stories, but that’s okay with me. I just want to let you guys know that in life you can make anything fun, and it’s just the way you look at things! In the end, a road trip or a day in the city would have given us the same things that working together did. Don’t feel pressured to not do what you are passionate about, just enjoy doing what you love!

Now this recipe is amazing because Rhubarb is one of my all-time favorite summer vegetables that my mom would grow in her garden. She used to let us pick a stalk and peel the red skin off so we could have them as a snack. The thing is, we always got the stalks of rhubarb accompanied by a small cup of sugar for dipping the rhubarb in. The taste of the rhubarb coated in a layer of sugar was amazing! It wasn’t even one of those moments when kids only used the rhubarb as a vehicle to eat sugar and then the Rhubarb is left behind. We wanted to enjoy them together! 

Unfortunately, Florida and Connecticut are very different states and I have a hard time finding Rhubarb anywhere. Thankfully I was at a local farmers market and found beautiful stalks of Rhubarb just waiting to be made into something delicious! 

So on our fifth anniversary, we made this Rhubarb Peach Crisp for you to enjoy!

LL 107-5.jpg

Ingredients

Filing 

  • 2 1/2 cup peeled & chopped rhubarb

  • 1 cup chopped peaches

  • 2tbsp lemon juice

  • 2 tbsp arrowroot powder

  • 1/2 cup coconut sugar

Crumble

  • 1/2 cup almond flour

  • 1 1/2 cup gluten-free oats

  • 1/2 cup coconut oil

  • 1/4th cup coconut sugar

Instructions

  1. Preheat the oven to 375F and spray a glass pie plate with coconut oil.

  2. Peel your rhubarb so that most of the red skin on the outside comes off. 

  3. Chop up your Rhubarb and peach. In a large bowl, combine your chopped rhubarb and peaches, lemon juice, arrowroot, and 1/2 cup coconut sugar, and set aside.

  4. In a separate mixing bowl combine your almond flour, oats, coconut oil and 1/4th cup coconut sugar until fully mixed and there are no lumps of coconut oil. 

  5. Pour your fruit mixture into your pie plate and use a spatula to spread out the fruit evenly, making sure to cover the whole bottom.  

  6. Crumble your dry mixture on top until well coated. 

  7. Bake in the oven for 35-45 minutes. It should look golden on the top and the fruit should be bubbling, but not burned. 

  8. Let cool for about 20-25 minutes

  9. Serve warm with vanilla & strawberry ice cream and enjoy!

RHUBARB CRISP PIN 1.jpg

3 Ingredient Cookie Bites // Vegan & Gluten Free

Simple, quick, bite-sized, and delicious! All of the qualities I was looking for in a recipe this time! I wanted to create something quick and easy you could bring to a Halloween party, make for yourself instead of buying candy, or just a fun recipe to make with your kids!

My goal was to keep the ingredients really simple, but also accommodate people with a lot of allergies. Thats why I skipped the eggs and gave you the option so use whatever type of “Butter” works for you!

using oat flour is a great cheap and easy alternative for flour! You can make it by blending oats on high until it turns into a fine powder. I use gluten-free oats, but if your not gluten free, regular oats will work perfectly fine!

I also want you to feel free to use whatever chocolate you like! I ended up using dark chocolate with almonds which added great texture to the cookie!

test1 (40 of 51).jpg
test1 (6 of 51).jpg

SO here for you are the directions to make this beauty!

Ingredients

½ cup oat flour

1/3rd cup nut butter

1/4th cup syrup

1 bar of your choice chocolate 


Grease a baking sheet & preheat the oven to 350F

Mix together syrup, flour, & sunflower butter. 

Scoop mixture with a teaspoon measure and roll dough into balls, it should make about 22 cookies.  

Cook for 10-12 minutes, the cookies should turn a golden brown.  

While the cookies are baking cut your chocolate bar into squares.

Take the cookies out of the oven and press one square of chocolate into each cookie.

Let cool in the fridge & enjoy!

PIN IT!

cookie bite pin.jpg

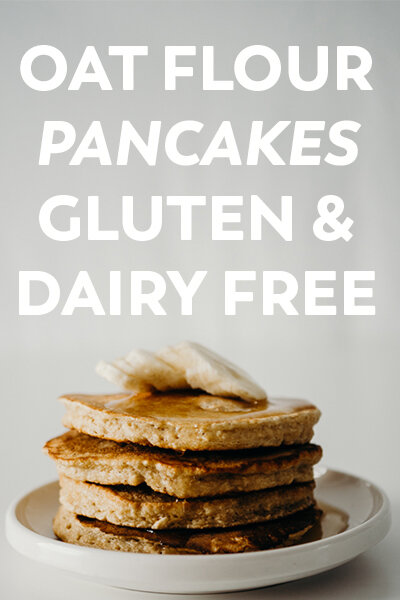
FLUFFY OAT PANCAKES // GLUTEN FREE & DAIRY FREE

I don’t know about you but when it comes to pancakes, Daniel and I mean business. We even have a weeknight dubbed pancake Saturday, where I come home from work, we make pancakes and watch a movie. Our favorites being Harry Potter and Lord of the Rings!

Every week it seems that I try a new recipe for myself since Daniel makes his perfect gluten and dairy-filled pancakes. He guards the secret family recipe with his life so don’t ask…sigh*

Anyway, each week I make my pancakes and have always faltered between near perfection, and pancake scramble that might sometimes taste like baking soda…I decided it was time to change so I gathered myself together and went to work!

My criteria for the pancaked were that they would be accessible for everyone, gluten & dairy-free, and if you don’t have allergies can be made with normal ingredients. I wanted the pancakes to be on the hardier side as well to keep you full and satisfied while maintaining that fluffy texture!

LL 107-1.jpg

For the flour, I chose oat because it’s cheap, easy, and easy to make! All you have to do is blend up your gluten-free or non-gluten free oats in any blender until a fine powder forms. If there are some larger pieces left that’s okay too! Just get it to the finest flour for the best results!

For the Dairy-free yogurt, I use an almond-based one. It is thicker than a lot of coconut yogurt, but feel free to either replace the dairy-free yogurt with regular yogurt, or even apple sauce. They will have a different flavor with the apple sauce of course and won't be as fluffy, but still very good!

Now all you have to do is combine all the ingredients and cook on a skillet at medium heat. This batch makes about 6 medium-sized pancakes. (I used a 1/4th cup measure).

LL 107-1-7.jpg

Now without further delay, here is the Perfect Pancake recipe!

Time 30 MInutes

Serving Size: 2

Makes 6 Pancakes

Ingredients

  • 1 cup oat flour

  • 2 Tbsp. coconut sugar

  • 1 tsp baking powder

  • 2 eggs

  • 1/4th cup dairy-free yogurt

  • 1/4th cup plant-based milk

  • 1 tsp vanilla

  • coconut oil for the pan

Directions

Whisk together the dry ingredients and then add in all of the wet ingredients. whisk until fully combines.

Grease a skillet and turn stovetop on medium heat. Let warm before pouring pancake batter onto skillet. Once bubbles begin to form and the edges of the pancakes are cooked about halfway through flip them.

Continue until all of your pancakes are cooked.

Serve warm with maple syrup, banana, chocolate chips, and almond butter for a breakfast/brunch/dinner you won’t forget!

Enjoy!

don’t forget to pin it

PANCAKES PIN.jpg

Easy Homemade Oat Milk

I don’t know about you, but when it comes to alternative milk, I am a believer in almond milk! Once I heard how delicious Oat milk was, I'll admit I was a little skeptical. When I tried it in a latte my feelings changed, and then I learned it was extremely easy and CHEAP to make at home!

After some research, I saw that a lot of people struggled with the milk ether being too slimy, watery or bland. So I rolled up my sleeves, searched the internet and got to testing recipes!

Since I don't own a cheesecloth, I found that an even better method was to use a dish towel! This material is thicker and doesn’t let through any of the pulp that makes the milk slimy. Thankfully I have dishcloths and I even found one that I had not used…more than once!    

To solve the flavor and texture trouble I chose to use less water and more sweetener than originally because I found that it was creamier and a better taste!

test1 (1 of 20).jpg

So for your amazingly delicious, homemade gluten-free oat milk here are your directions!

test1 (6 of 20).jpg

Ingredients

  • 1 cup gluten-free oats

  • 3 cups of filtered water

  • 2 dates

Directions

Combine all of the ingredients into a high powered blender

Blend on high for 30 seconds

Strain through a Dishcloth 

Store in the fridge up to 6 days.

Use for drinks, baking, cooking or just drink it straight! 

Note* you can add in pumpkin spice or vanilla for some fall flavor!

Thank you again for stopping by! 

Yours truly, 

Sonya Peacocke

Carrot Cake Pops: No bake, Gluten free & Vegan

I don’t know about you, but when it comes to desserts Carrot Cake is appreciated no matter when, but naturally with the budding of new blooms and a new excitement for fresh food Carrot cake is more then welcomed!

Recently my friend Natalie and I were trying to figure out how to spice up the traditional carrot cake recipe. Thankfully as we thought about it, my husband Daniel popped in with the ingenious idea of creating carrot cake pops!

If it’s as hot or busy it is here in Florida (hello spring break!) you’ll be happy to hear that this is a no-bake recipe! SO These perfectly delicious and healthy carrot cake pops are no-bake, Vegan, Gluten-free and FULL of flavor! Definitely a recipe to make the whole family happy! 

4G8A5880.jpg
4G8A5953.jpg

Ingredients  

½ cup applesauce

1/3rd cup SunButter

½ cup shredded carrots

1/4th cup maple syrup

2/3rd cup coconut flour

1 tsp. cinnamon

½ tsp. ginger

½ tsp. nutmeg

1 tsp. vanilla extract

Pinch of salt

1/4th cup chopped walnuts

Glaze

3 tbsp. coconut oil

1 tbsp. SunButter

2 tbsp. maple syrup

1 tbsp. lemon juice

Shredded coconut for coating  

Directions

Combine all the wet ingredients and then add in the dry.

Roll into cake balls and let chill in the freezer for about 15 minutes while you make the glaze.  

For the glaze mix together all the ingredients, making sure that your coconut oil is melted beforehand.  

Take the cake balls out of the freezer and coat with glaze and then coconut!

Serve and Enjoy!

Vegan & Gluten Free Grasshopper Cookie Cups

I don’t know about you, but when it comes down to cookies going gluten-free doesn’t really hold the best options. Thankfully this recipe makes up for all of the moment’s when you questioned a baked good that wasn’t made of flour.

This cookie cup tastes like a chocolate brownie filled with a creamy mint filling that perfectly mirrors the flavors of mint chocolate chip ice cream!

So, without further ado here’s the recipe!

4G8A4892-2.jpg

Ingredients

Cookie Cup

• ½ cup (125g) SunButter

• 1/3 cup (105g) maple syrup

• ½ cup (50g) cocoa powder

• ¼ cup (25g) almond flour

• 1/2tsp baking soda

• ½ tsp salt

Filling

• 1 cup coconut cream

• 1 tbsp. maple syrup (optional)

• 1 tsp mint extract

• 1/8tsp spirulina

• Mini chocolate chips for sprinkling

Directions

Preheat the oven to 350 F. Coat the bottom of a full sized cupcake tin makes about 6-8 cups and bake for 20-25 min to make 6-8. For mini cups the recipe makes 20-24 cup, baking them for 12-15 minutes.

Let cool and then fill with mint cream and top with chocolate chips!

Hope you enjoy!

-Sonya

4G8A4835-2.jpg